Welcome to the assembly guide for Blueberry!
Please use your desktop device if you're on mobile or have used the QR code. However, this website is also built for mobile!

Home
Please use your desktop device if you're on mobile or have used the QR code. However, this website is also built for mobile!
Use your scroll wheel to navigate down the sections with ease. Additionally, sections and page are visible on the left section!

For further support or inquiries with the board, reach out to us on Discord or email, both linked in the navigation menu
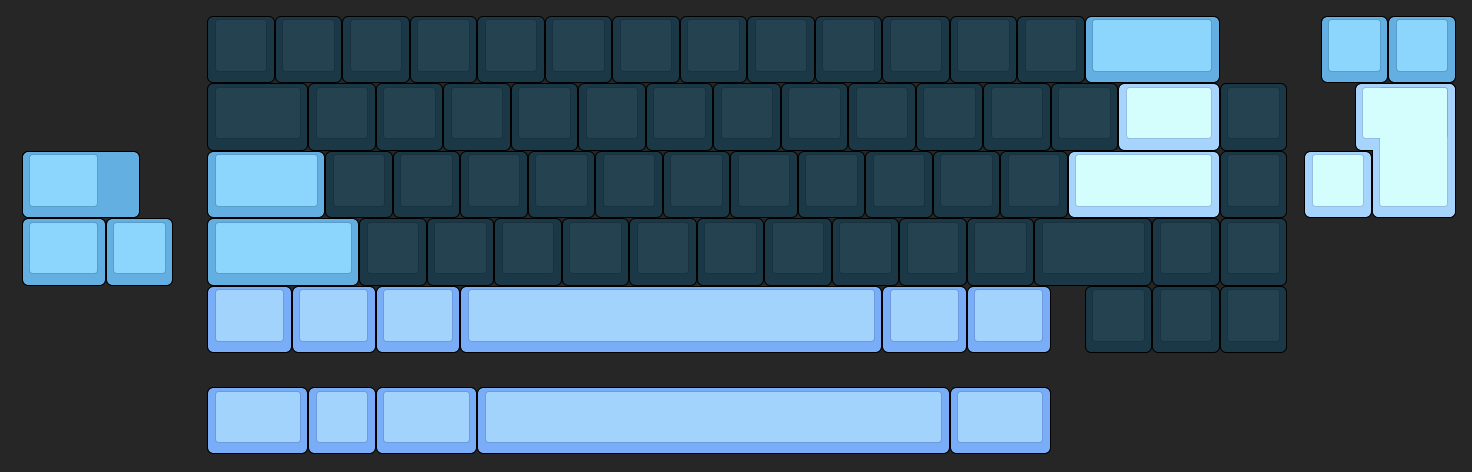
Choosing a layout
Firmware Downloads
Overview

Foam Properties
Configuration recommendations
Case Foam/Silicone Dampener on PC variants + Plate foam. PE foam omitted to provide more unique sound characteristics.
No foam, or PE foam only. Board may feel softer however will produce a sharper and less refined sound profile. May be preferred by certain users.

Overview
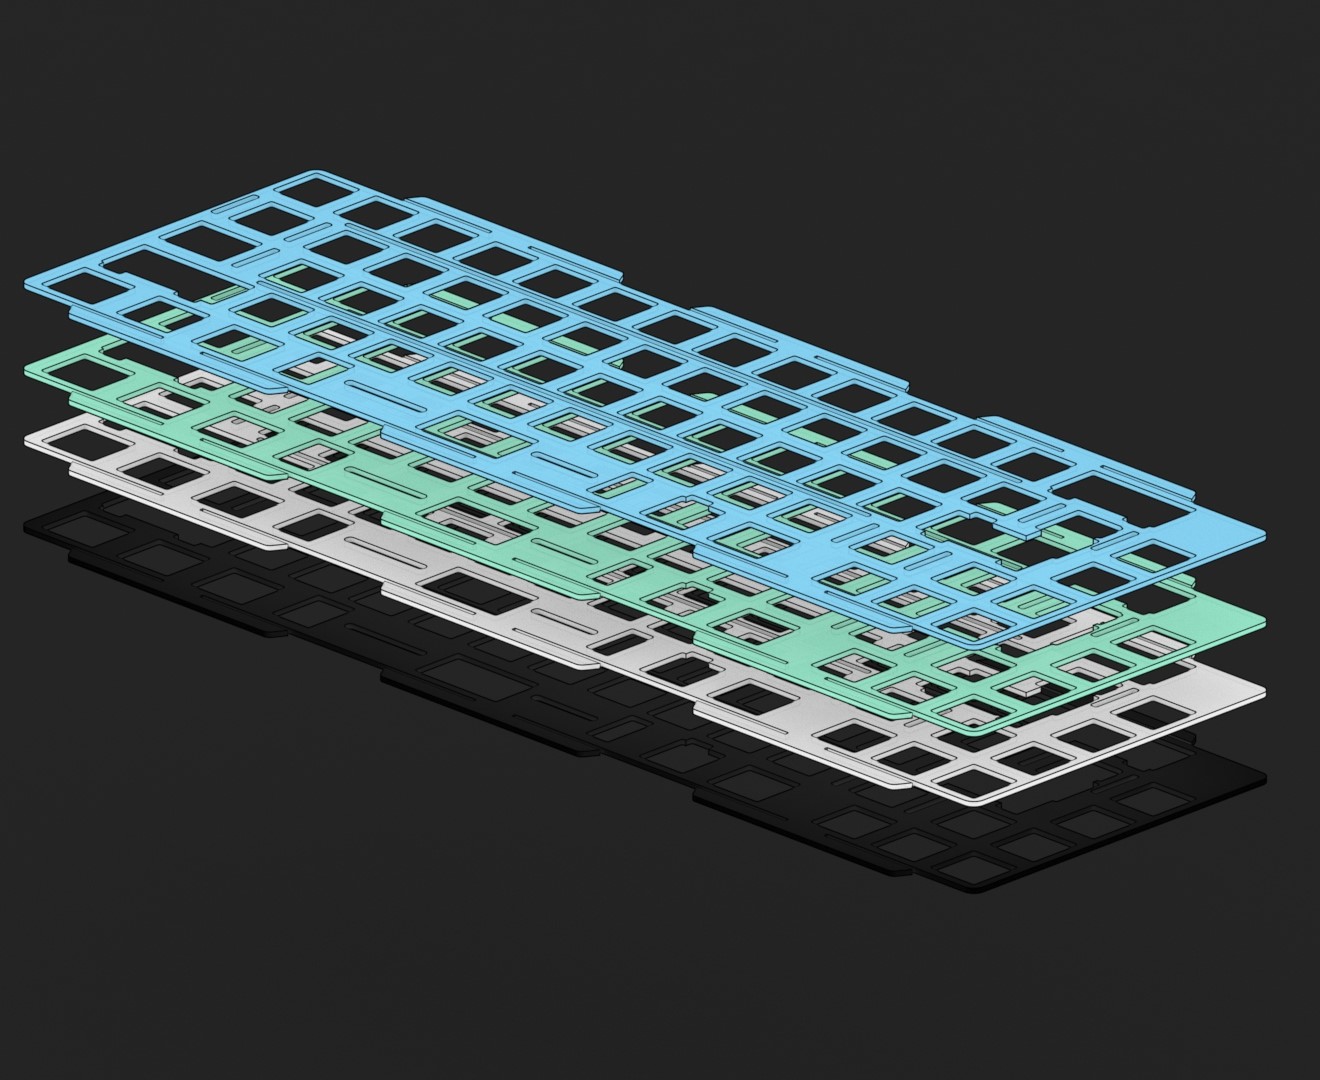
If you're looking to buy extra PCBs, extra plates are a must! This will save you time desoldering and you'll be able to have multiple configurations, ready to go. (Applicable to solder PCBs only)
If you're looking to buy extra PCBs, then extra plates are a must!
Additionally, you might not like the way your plate material sounds on your unit, or want to try different configurations!
Extra plates will allow many different configurations when using solder PCBs
Polycarbonate is the safest and usually most popular plate material on a board like the Blueberry, taking full advantage of its flex.
Usually produces a higher pitched sound, with a firm typing experience - a fairly harsh bottom out.
Higher pitched, with a firm typing experience and harsher bottom out.
Provides a deeper, more muted sound with a noticeably softer typing experience due to the flexibility in the plate material.
Deeper, more muted sound with a noticeably softer typing experience due to flexibility in plate material.
A well rounded plate material, generally between Brass and Polycarbonate.
Pick one of the stiffer plate options as listed below:
FR4 | Aluminium | Brass
We don't recommend using a hotswap PCB with a soft configuration, as it can result in poor switch stability. However, it is still viable, albeit a little challenging to use.
Hotswap PCB + Soft configuration is not recommended due to poor switch stability. It is still viable however!
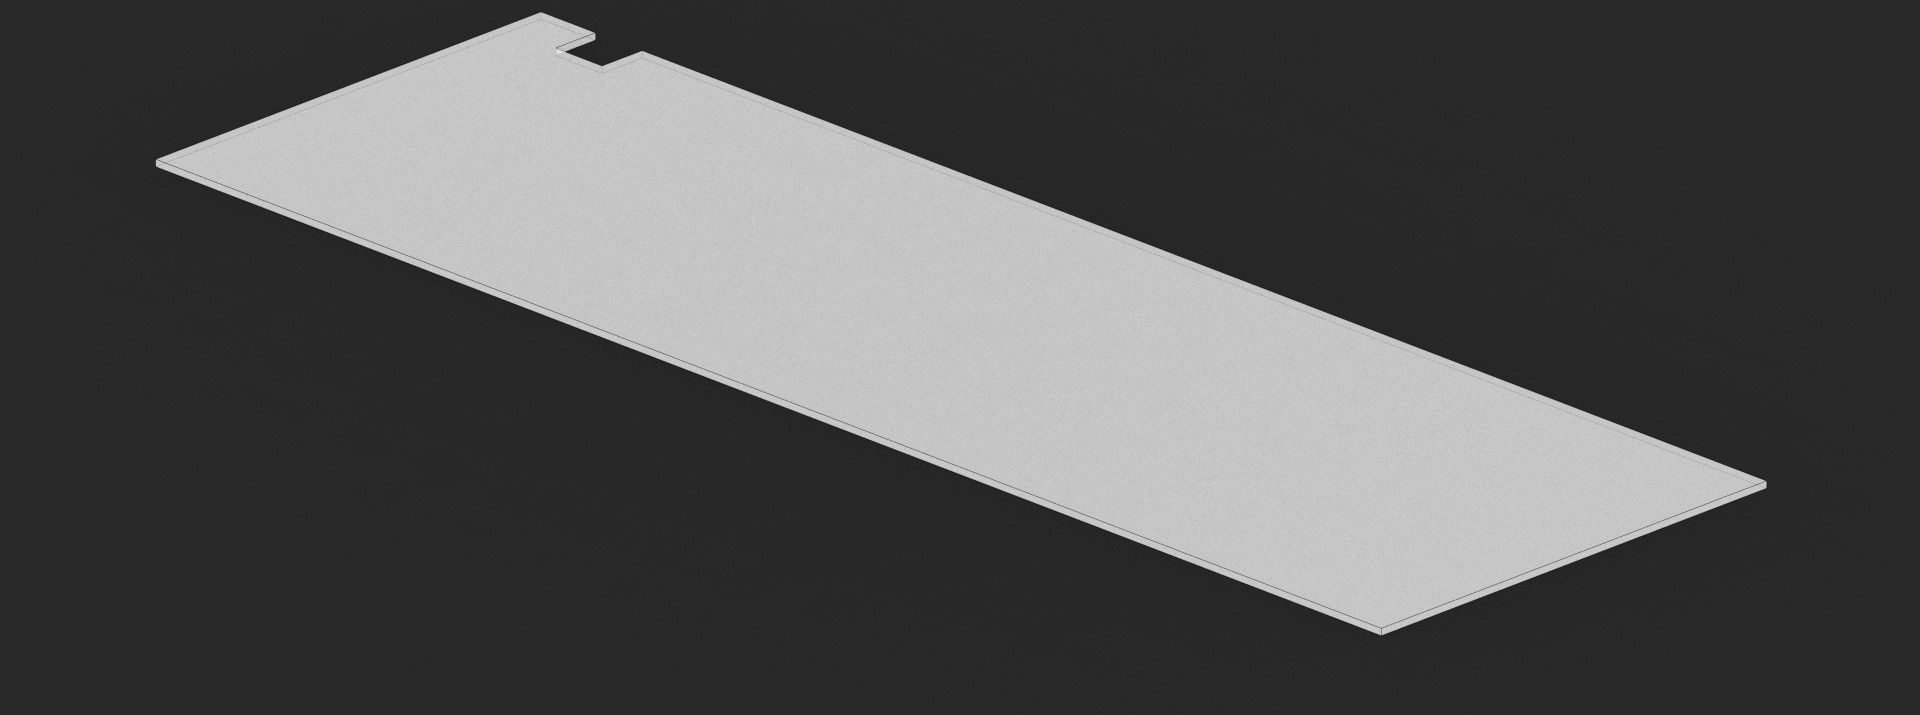
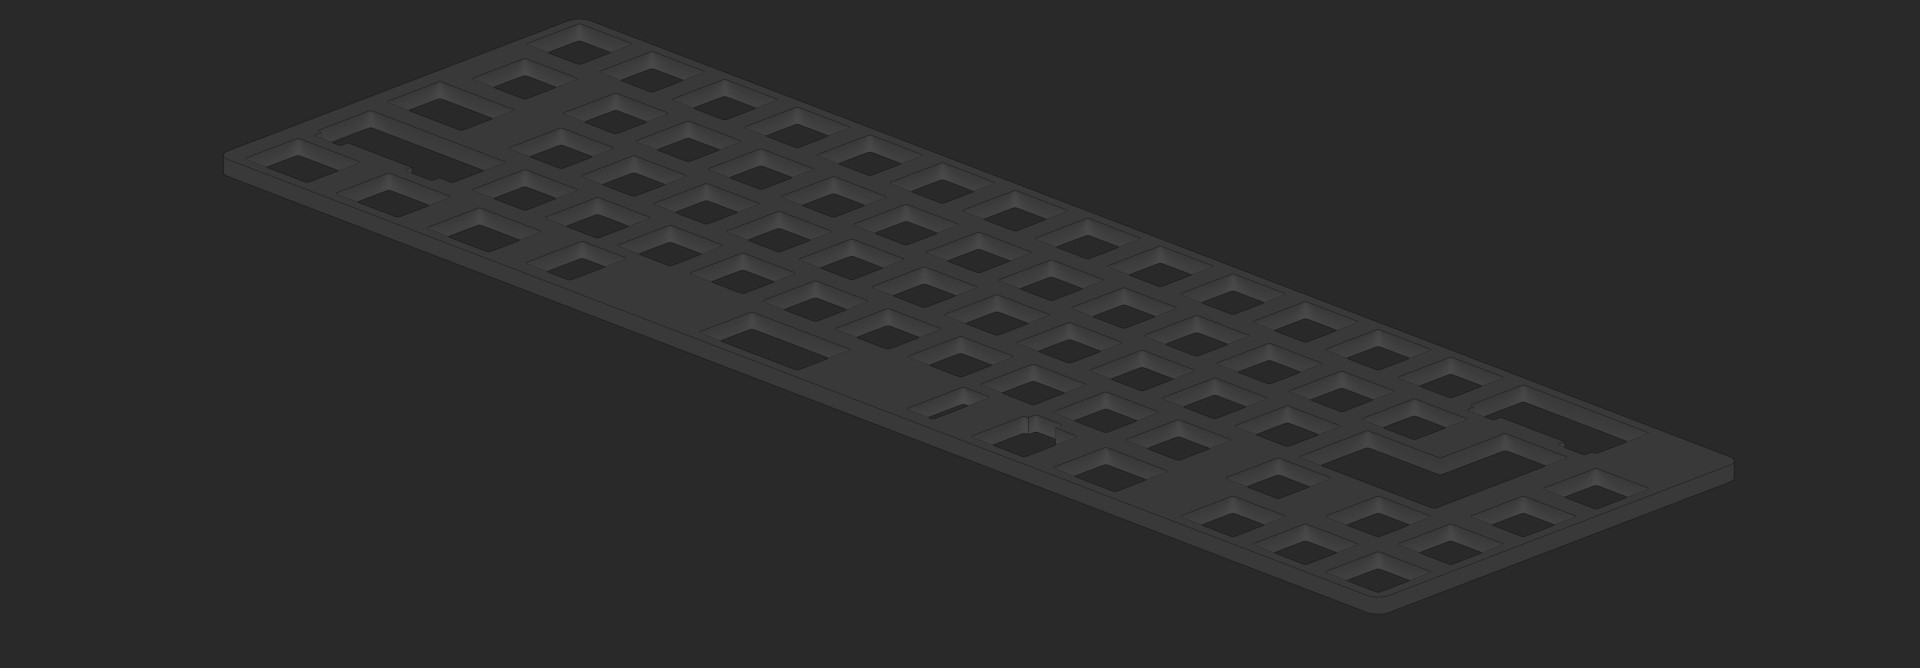
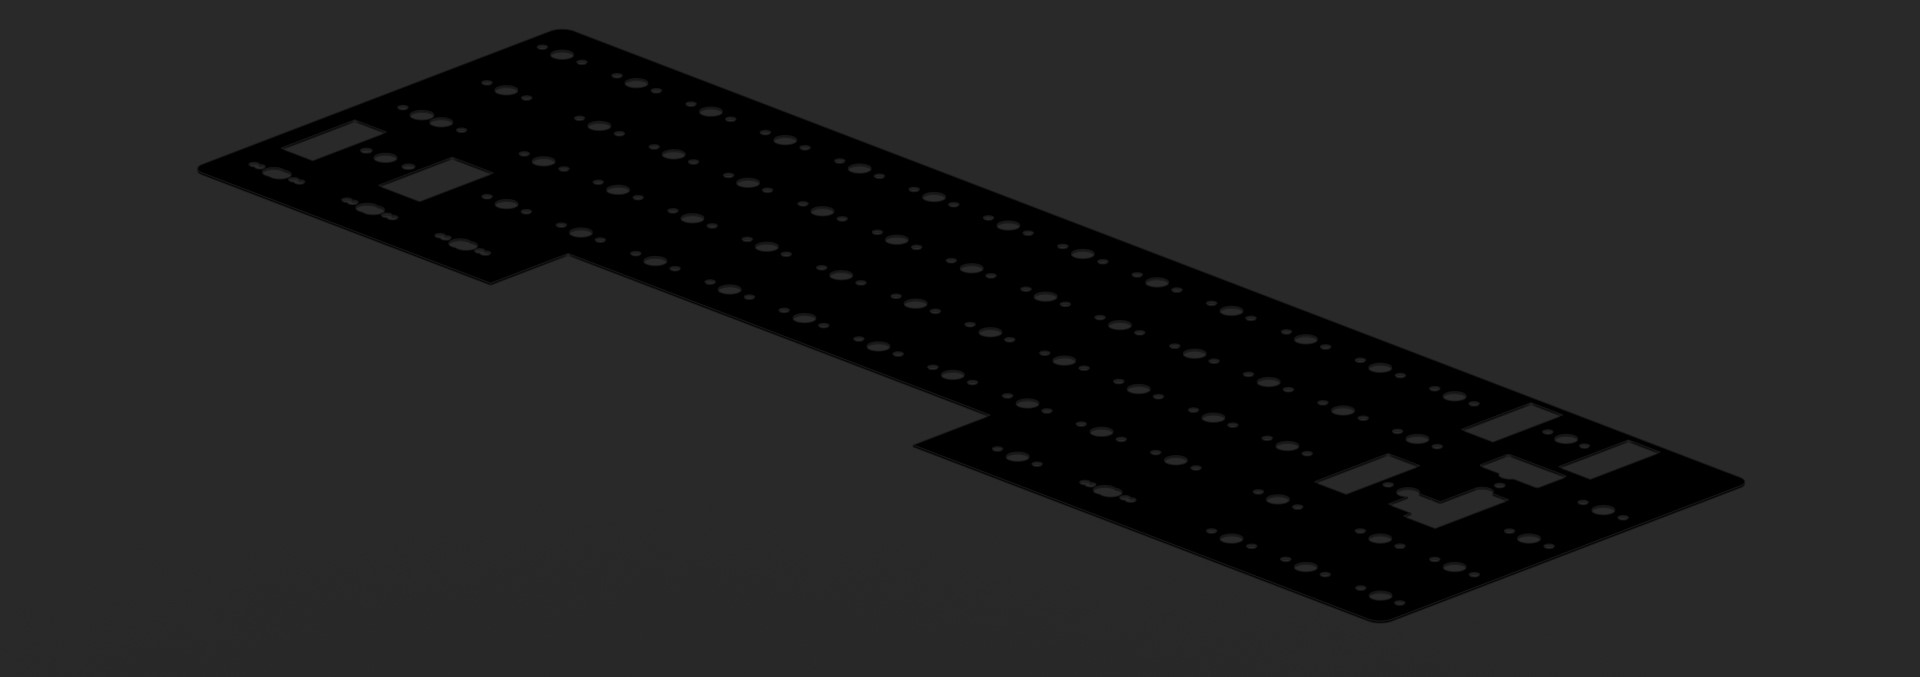
Keyboard Plate Assembly
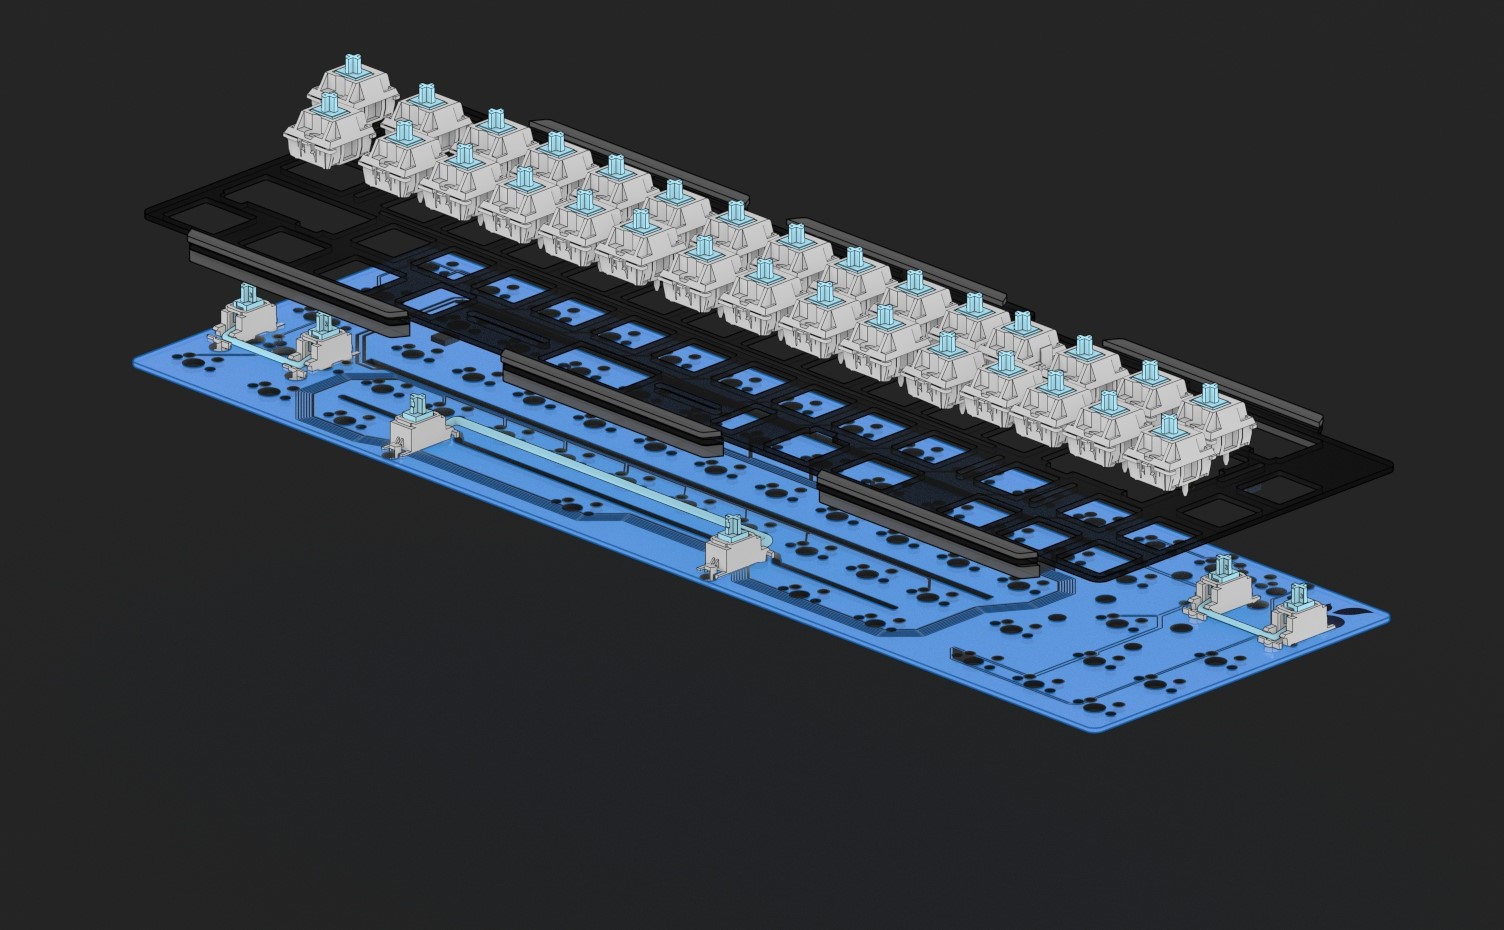
Plate and PCB Assembly Diagram
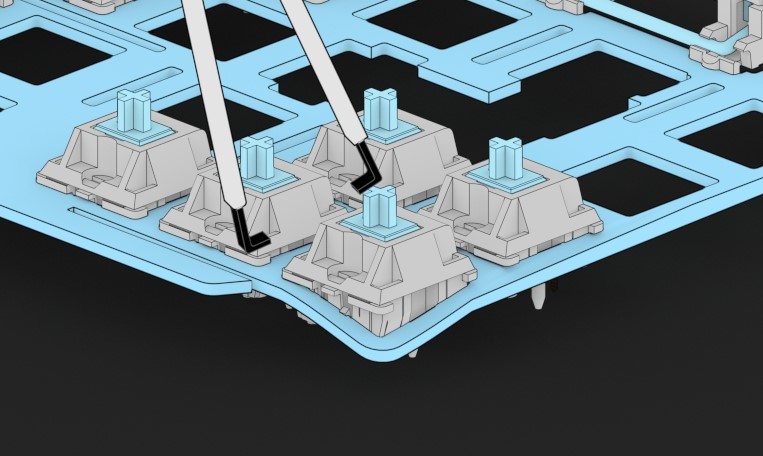
Prying plate demonstration
Lay your plate on top of your PCB, then insert the switches into the assembly, confirming that the bottom of each switch contacts the surface of the PCB, and that the top of the switch is firmly locked into its switch cutout. With soft plate options (PC, POM) you will need to pry the plate upwards to ensure that it snaps snugly onto the top of each switch. You can use a switch puller to make this process easier.
Depending on which plate material you have chosen, plate assembly may vary significantly in difficulty. The aluminum plate option is great for hotswap PCBs and due to its rigidity, can be a lot easier to work with.
Plate foam can help make assembly with softer plates much easier, as it provides support
PE Foam is very easy to add to your build, and helps bring out the "pop" in the board! However, some argue that PE foam mutes too much of a board's sound signature.
Inserting into the case

The PCB should not be placed directly into the case. Line the PCB's USB port up with its cutout first, before placing the top shell of the case on.
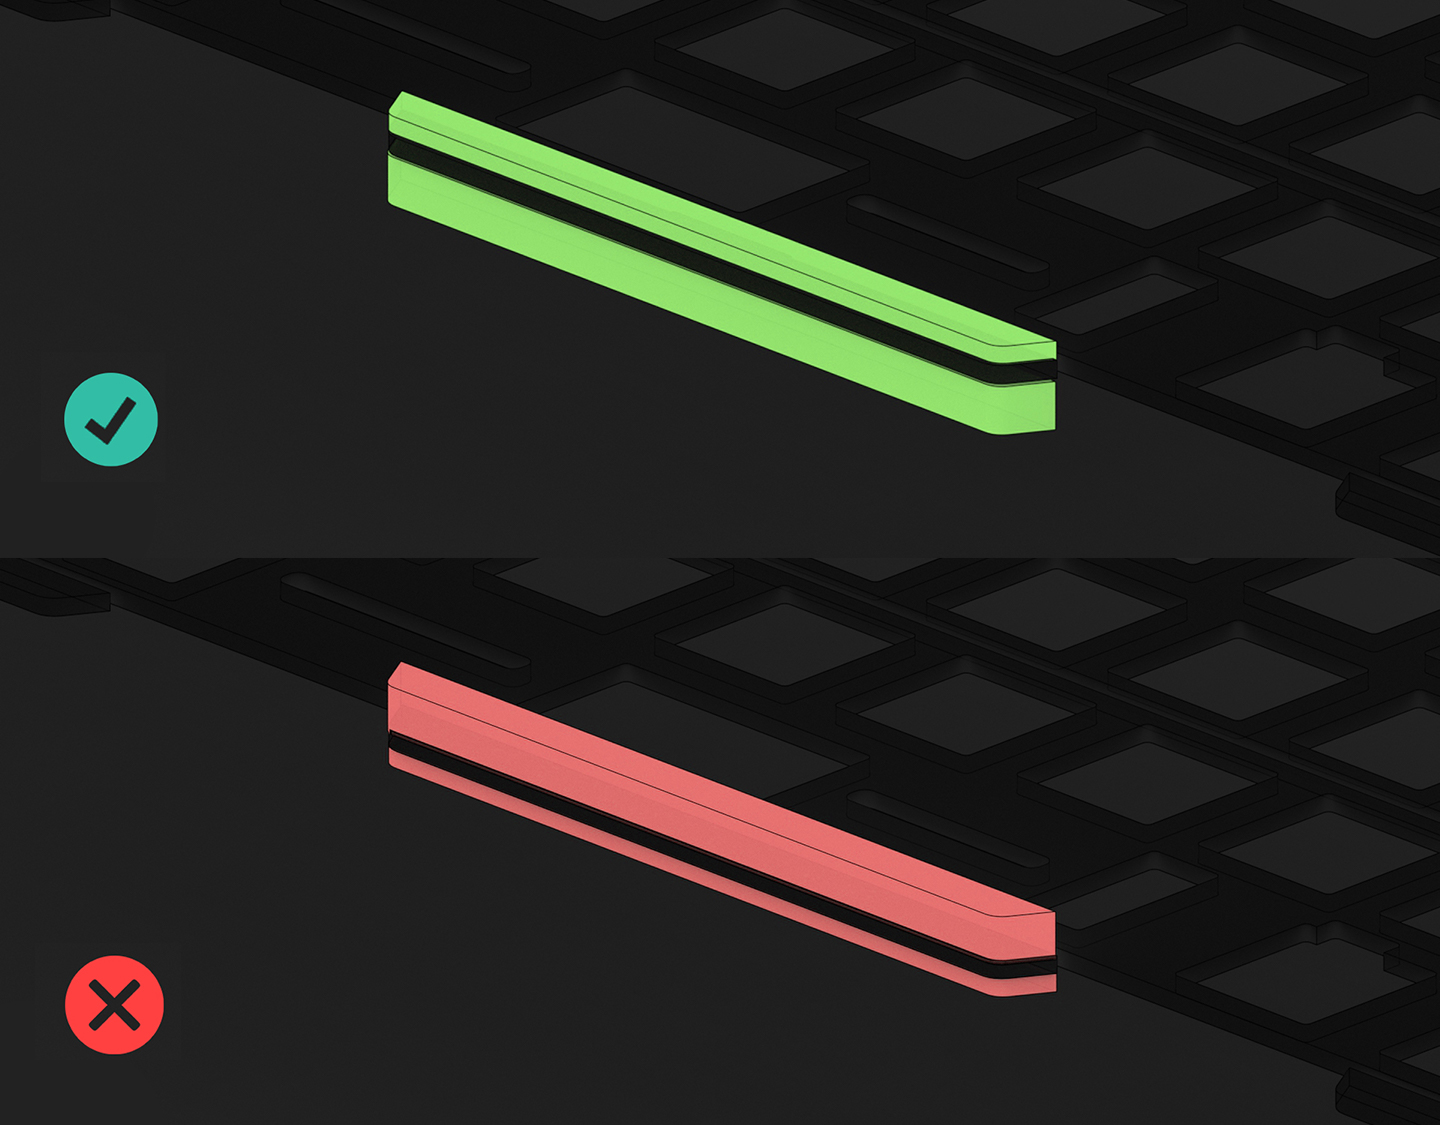
4mm Gaskets should sit on the lower shell, while the 2mm gaskets should sit on the top shell cutouts.
4mm Gaskets should sit on the lower shell and the 2mm gaskets on the top shell.
It is not recommended to swap the top and bottom gaskets. Ensure that gaskets are adhered properly and sit in their cutouts correctly before inserting the PCB and Plate Assembly.
Quick guide to testing your PCB
Final Message
Thank you for purchasing this board! A significant amount of time and effort was taken in the design, prototyping, and production of this keyboard.
You've now assembled your Blueberry! We hope you have a memorable experience with this board and that you have fun tinkering and tailoring this board to your preferences using the provided plates and guides!
Sincerely,
Adam from Toffee Studio